In the basic version, it is a program that helps maintain HTTP and HTTPS traffic, allowing it to stop, edit and reject requests sent from the web browser. It is extremely useful for checking the behavior of the web application, after sending data other than what is allowed at the browser’s frontend. This can be done in real-time (that is, stop the request, modify and forward), or using the history of requests sent so far, along with server responses.
Additional functionalities like various scanners, fuzzers, dictionaries, etc. are included as additional modules. Several of them are pre-added; later in the article they will be treated as part of the program.
One of the assumptions of the project is its affordability for beginning security research. That’s why you can choose between work modes—from completely safe to invasive—to avoid unauthorized actions when learning to use the program. In addition, each vulnerability class found is described, along with ways to protect it.
ZAP is created on the OpenSource basis by the OWASP organization dealing with security on the internet. The assumption is to support both manual and automatic application testing in terms of security.
The methods of scans and attacks described below (in ZAP, each scan is called an attack) are presented in a non-accidental order. It is a scenario of a simple application security test.
Beginning
HTTP Configuration
The first step is to set up a browser to connect through a proxy (in this case, a local ZAP). The default data for a local connection is:
server: 127.0.0.1 port: 8080
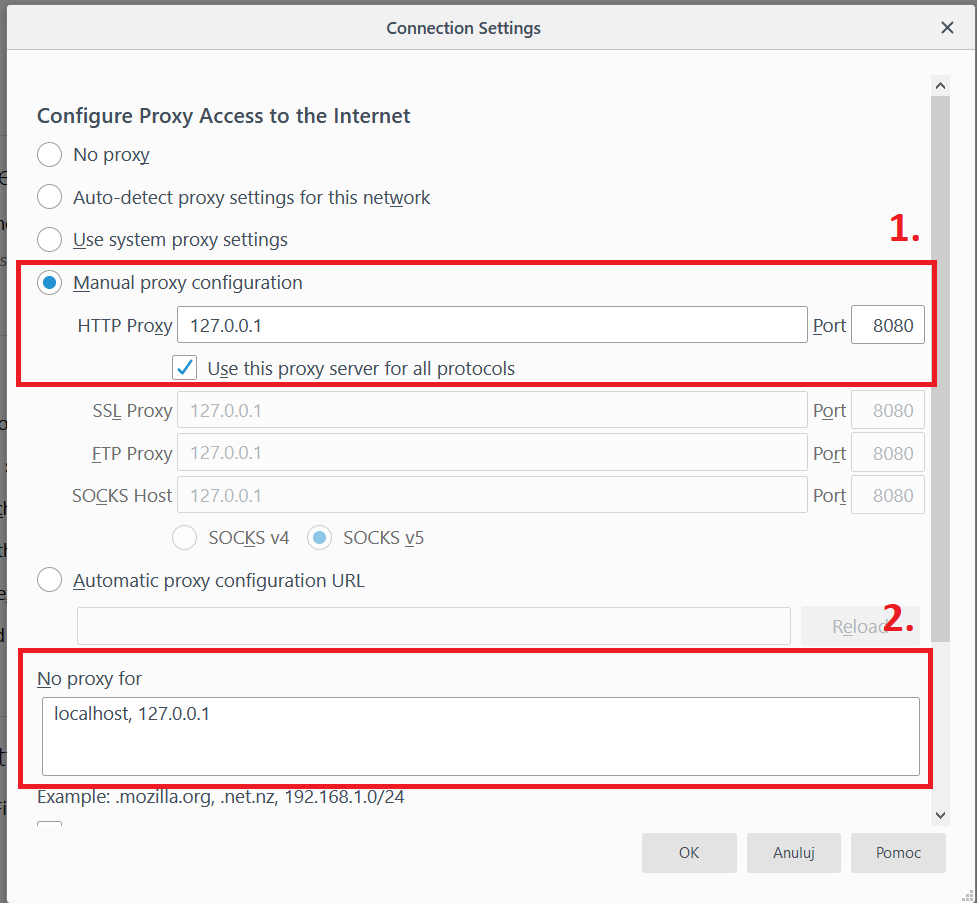
(Note: often in browsers is a list of exceptions from the proxy. By default it is localhost or 127.0.0.1. If we are testing a local application, removing this exception may be worth considering).
From now on, all communication passes through ZAP. Each new request can be seen in the Sites tab.
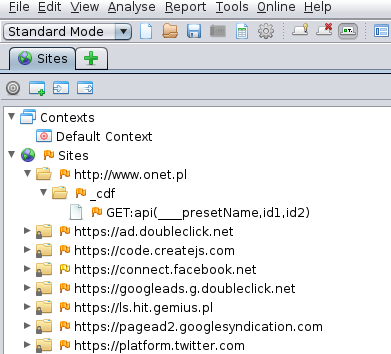
Fig.2. Window of discovered resources
The flag at the resource identifies potential security gaps. The more red the flag, the more serious the potential gap.
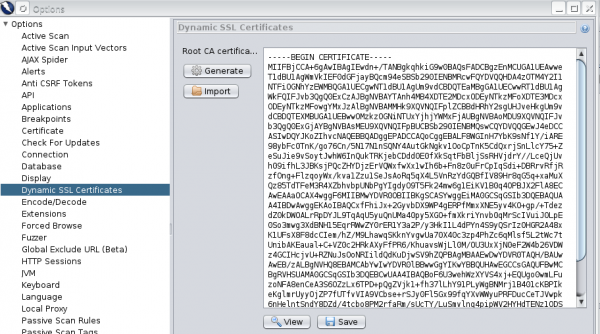
HTTPS configuration
To use our tool in the browser on pages requiring HTTPS, we need to import ZAP certificates into the browser. Otherwise, the browser will show the page with information about an incorrect certificate, or in the case of the HSTS header, it will not allow entry to the page at all. The certificate can be found in the ZAP settings in the Dynamic SSL Certificates tab.
What contexts are
An internet application can be tested simultaneously from several different access levels; e.g.:
- as an anonymous user
- logged in to the basic account
- logged in with administrator privileges (Users and Authorization tab in context edition)
In addition, part of the application may have a different parameter submission structure in the URL (Structure tab). Contexts will help here. All you have to do is create a separate context for each user that you will be testing, and then, by right-clicking on interesting resources, join selected contexts.
A double click on the context opens the window of its properties.
In Protected mode, contexts can also be used to isolate part of the page for testing so that vulnerability scanners would not attack third-party resources.
Modification of requests in real-time (Proxy)
ZAP allows you to capture and edit requests to the server. This function can be started by pressing the round button icon.
After clicking on it and then entering any page using the configured browser, the entire page will show in the Break tab. If necessary, we can refuse the request; for example, to check what the application will do when it does not receive a response.
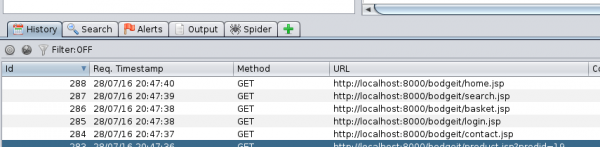
In the History tab (in continuous mode), communication with the server is saved. After selecting the request, you can view it along with the answer. By right-clicking on the history and selecting Resend, you can edit and resend the request (just like the Repeater in a competitive BurpSuite program).
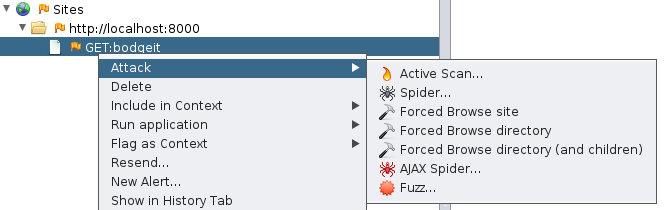
Attacks/Scanners
Spider
After manually discovering the most important resources, it’s time to reveal the less obvious ones. To do this, we will scan using the Spider tool:
During the scan, the newly discovered resources will appear in the list.
If you are interested in graphics that are being pulled in during the site’s operation, JavaScript scripts, or Ajax communication with a “live” browser – AJAX Spider will be useful. In this situation, the scanning process takes much longer, because once the page is loaded, it waits in the indicated time for possibly downloading further resources. However, it allows you to view the resources downloaded by JavaScript as soon as the page loads.
Forced Browse
And what if the site has resources in the so-called “Deep hiding”? I.e., nowhere linked (in the hope that they will not be found by anyone)?
Or, when the developers have forgotten to delete the configuration files, or the repository?
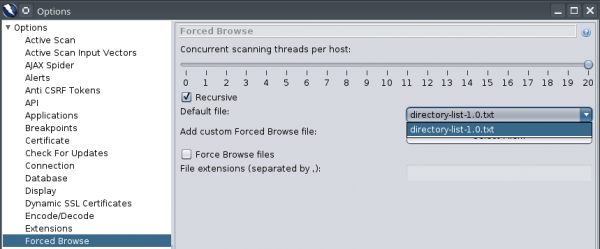
The Forced Browse attack comes in handy. It checks on the “brute force” principle if there are resources with popular names in the application under review. The scope of the search can be expanded by adding files with phrases in the program settings.
Fuzzer
Once we find out which parameters are sent to the application, we can try to inject code attacks or use non-standard data. While previewing any request, just select the changing string of characters.
Here, the Resend tool was used on historical demands:
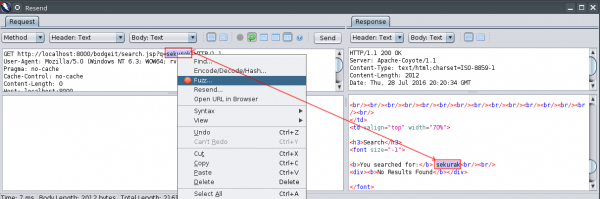
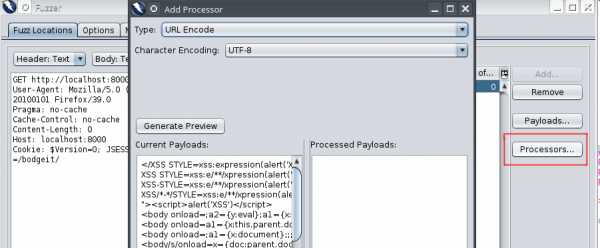
Subsequently, Fuzz should be selected. We can pick several different places for fuzzing at the same time. Each one is marked with a different color. After that, we set up the values we want to substitute in the chosen place (so-called payloads). It is a search engine on the website, so it is certainly worth checking if it is vulnerable to Cross-Site Scripting (XSS).
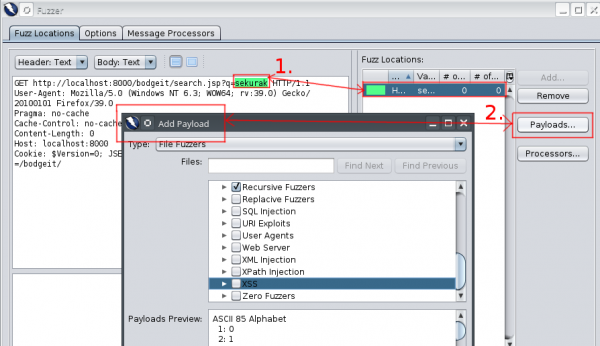
In the next step, we choose how the values are passed to the application—whether they are encoded in base64, md5 or otherwise. In this example, the fuzzed string is in the URL, so we choose the URL Encode to make it look like it was actually sent by the browser (just in the URL, you can skip this step – ZAP will convert the characters to valid).
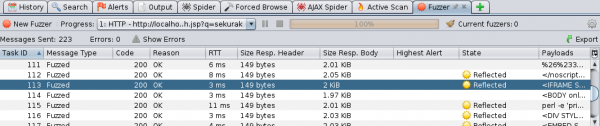
If we are lucky, ZAP will mark which applications are vulnerable. It is also worth analyzing the responses to sent payloads—they can lead us to the problems we found earlier. I recommend separate opening of individual scans in the browser and tracking their results.
Active Scan
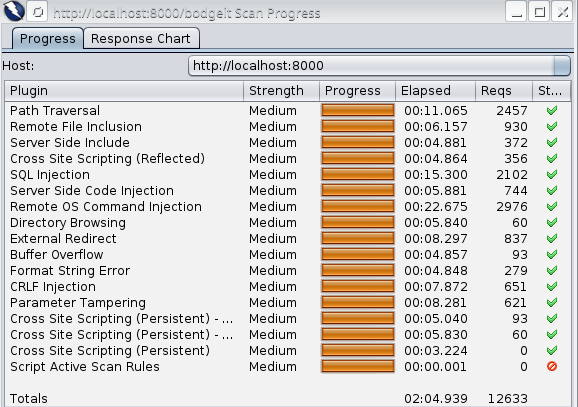
In addition to passive vulnerability search, an active scanner is built into ZAP. It sends requests to indicate possible vulnerabilities. It uses discovered resources, so it’s a good idea first to manually find the Spider, find as many pages as possible and then engage Active Scan. It lasts for quite a long time, so it is a good practice to first prepare the exact contexts of the resources that you want to check and then perform a scan on them. Keep in mind that some requests may be invasive, as no automatic scan can replace a human.
Active Scan used on the example of the WackoPicko application found XSS in the search engine and the possibility of remote code execution on the server.
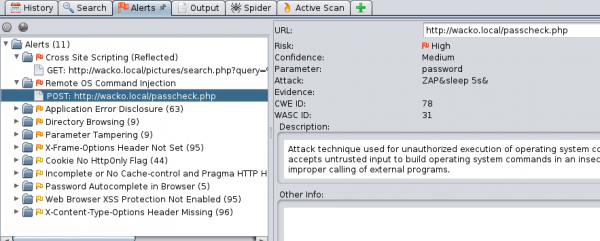
In addition, Active Scan showed links to directories that are not protected against listing content. It can be a valuable source of information about the structure of the application.

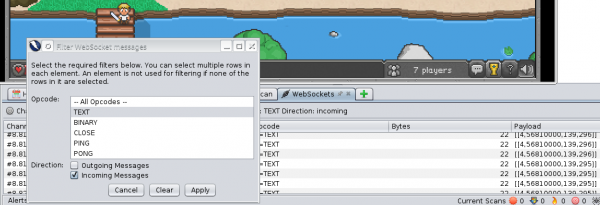
WebSockets
Handling of WebSockets is similar to operating on normal HTTP requests, but has its own separate tab with history. The requests sent can also be viewed, paused (works only after setting the breakpoint) and resent.
We can start the game with the browser game http://browserquest.mozilla.org (I recommend using Firefox—other browsers may have problems logging in through the ZAP proxy).
Let’s start with incoming communication. While moving around, and there are no other players nearby, not much happens. Thus, let’s attack the monster. Something is happening. Requests appear with content that looks like a two-dimensional array in JavaScript [10,60]. The first value does not change; it is probably the type of action being performed. The second value decreases. Let’s send the query again—already outside the fight. The browser gets the request from ZAP, not from the server (health points decrease). The second value indicates how many health points our character has left. Try to enter a negative value.
We should check now what the game is sending to the server. With each movement of the character, a three-dimensional table (similar to [4,128,33]) is sent, with information on the type of action (4-movement) and with the X/Y coordinates. By changing parameters, we send the server information that we are moving. Unfortunately, the browser “does not know” about these requests, and the character will not move on the screen. So we cannot do much about it.
Let’s try to attack the monster. Two packages alternately appear here: [8,78163] and [9,78163]. As in the others, the first value is the type of action, and the second one does not change this time. After fighting with several monsters, you can assume that this is the monster identification number, and one in these packages is the attack action.
What happens when we start sending it at smaller intervals than the game does? Is there a feedback message about the allowed attack speed, or is the client application (game in the browser) doing this?
I encourage you to try to see on your own how the communication between the game and the server is established. Maybe you will find something more interesting?
Other options
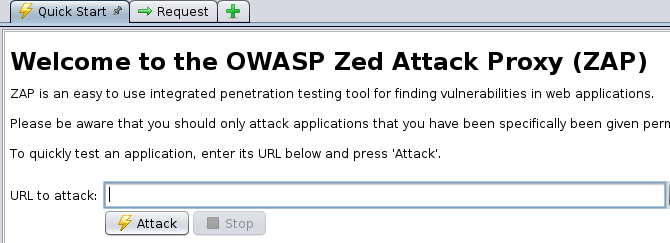
Quick Start
The first thing that stands out when you turn on the application is the encouragement to use the button in the Quick Start window. Just enter the URL and the application will use Spider itself and enable Active Scan on the resources found.
This is a useful option when using ZAP for automated application tests or as a quick test of the tool’s capabilities.
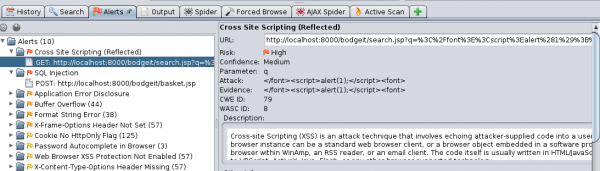
Alerts
In the Alerts tab, places worth checking are indicated. On the selected application, you can see how the attack was carried out, along with a description of vulnerability and security methods (great for learning from examples).
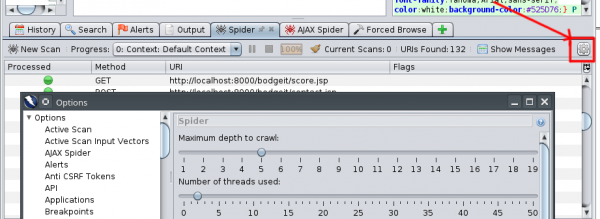
Parameters of Scanning Speed
Once we have direct access to the application being on the same network, sometimes we are incognito and we do not want scans to be detected. Therefore, we can regulate the parameters of each attack by clicking on the gear icon:
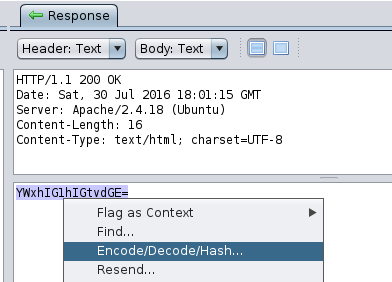
Encode/Decode
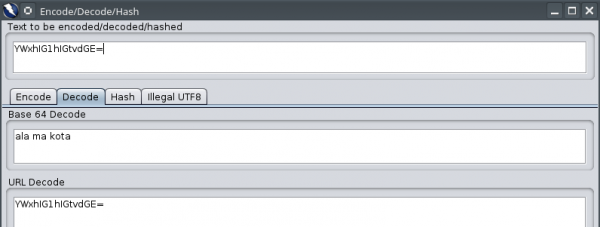
A small thing that sometimes may improve work. Instead of copying each encoded string to the decoder (e.g., on the websites designed for this), just select and choose decoding. In the following example, we suspect that the string can be encoded by using base64. Let’s check it.
A window with decoded values appears before us; in this case, the suspicions seem right.
Last Words
This text describes the built-in ZAP modules. Additional ones can be easily installed from the available marketplace—all add-ons are free. I recommend that you try ZAP’s capabilities yourself, especially since it is run on a Java virtual machine, which means the operating system is not a limitation.
ZAP, thanks to the ability to run in the console and control via API, can be connected to a support tool continuous integration (e.g., Jenkins), as an additional criterion for checking. This will allow programmers to catch possible vulnerabilities as soon as they are created.
Locally launched applications that intentionally contain vulnerabilities were used for the presentation:
BodgeIt written in Java
WackoPicko written in PHP
If you want to check your errors, I recommend OWASP Broken Web Applications Project, which provides many applications already configured in the form of a virtual machine image.